


Your shopping cart is currently empty.

Caring for Baby Chicks
How do you take care of baby chicks? This guide simplifies the process, whether you're incubating your own eggs or buying day-old chicks. Find out the best ways to care for your small flock from Brinsea, the Incubation Specialists!
Chick Care Essentials
- Provide a Safe Heat Source: Chicks need a reliable heat source until they are fully feathered (around 6 weeks). Heat plates like the EcoGlow are safer and more natural than heat lamps.
- Use Proper Bedding: Pine shavings are recommended. Do not use cedar shavings (toxic) or slippery surfaces like newspaper alone (can cause leg injuries).
- Watch for "Pasty Butt": This common condition where droppings block the vent must be cleaned gently with a moist towel to prevent it from becoming fatal.
-
Step 1: Getting Started - Incubate Eggs or Buy Chicks?
Many people interested in raising chickens choose to buy older pullets because they feel hatching eggs and caring for young chicks is too complicated. However, we're here to simplify the process and show you how rewarding it can be.
Why Try Incubating Your Own Eggs?
- It's Easier Than You Think: Breeding chickens can be quite simple. With modern small incubators, you can easily hatch as few as seven eggs at a time.
- A Rewarding Experience: The main reason to try incubating is the rewarding experience you and your family can share.
- Highly Educational for Children: Children especially love watching chicks hatch and then raising them. It's a hands-on learning process that creates memories for a lifetime.
Basic Project Timeline
The entire process from egg to a coop-ready chick is straightforward:
- Incubation Period: Approximately 21 days for chicken eggs. Always refer to your incubator user manual for specific settings.
- Brooding Period: Chicks need basic care (heat, food, water) for about 6 weeks. After this, they will be fully feathered and ready to move to an outdoor coop.
-
Step 2: Setting Up the Brooder
1. The Brooder Box & Bedding
Whether you incubate or buy, you will need a brooder set up. Depending on how many chicks you end up with (please account for "chicken math"!), your container can vary. Cardboard boxes, wooden crates, and plastic bins all make perfect brooders.
Line the inside with paper towels and suitable bedding like sawdust or pine shavings to provide a stable, firm ground to stand on. A slippery surface can result in injury or developmental issues. Proper sanitation is crucial to avoid disease, so bedding must be changed regularly, at least every couple of days, and more often if damp.
Bedding to Avoid: Do not use cedar shavings (toxic oils can harm respiratory systems), straw (can get moldy and harbor mites), or newspaper alone (slippery and potentially toxic ink).2. The Heat Source: A Critical Choice
Chicks need a constant source of heat until they are fully feathered (around 6 weeks). You have two main options:
Option A: Heat Lamps (High Risk)
Heat lamps are a common choice, but they present a significant fire hazard and are not energy efficient. They also produce constant light, which disrupts the chicks' natural day/night cycle.
Option B: Heat Plates (Recommended & Safe)
Heat plates, like our EcoGlow brooders, are extremely safe and use very little energy. They use radiant heat, which warms the chicks directly without heating the air, mimicking a mother hen. The plate itself does not get hot enough to burn the chicks, allowing them to nestle up to it for warmth and security. An EcoGlow also gives older chicks a place to roost.
3. Checking on Your Chicks: Are They Comfortable?
If you are unsure whether your brooder is warm enough, simply observe the chicks’ behavior. Their actions are the best indicator:
- Too Cold: Chicks will be huddled together directly under the heat source and may be chirping loudly or shivering.
- Too Hot: Chicks will be spread out far away from the heat source, often panting with their beaks open.
- Just Right: Chicks will be contentedly moving around the brooder, some eating or drinking, while others rest comfortably under the heat source.
-
Step 3: Food, Water & Health
Water: The First Priority
Once chicks are dry and in the brooder, they need immediate access to fresh water. They absorb the yolk sac before hatching, which provides nutrition for the first couple of days, but hydration is critical right away.
- Place the waterer away from the heat source to keep it cool.
- Clean the waterer regularly, as chicks will get bedding and droppings in it.
- Safety Tip: If using a saucer or deep dish, place marbles in it to prevent chicks from drowning.
Food: What to Feed Your Chicks
Chicks instinctively scratch for food. A proper feeder with a lid will help keep the brooder clean. After their first couple of days (living off the yolk sac), provide a commercial "chick starter" feed, which is specially formulated with all the nutrients they need. You can choose between medicated, non-medicated, or organic options.
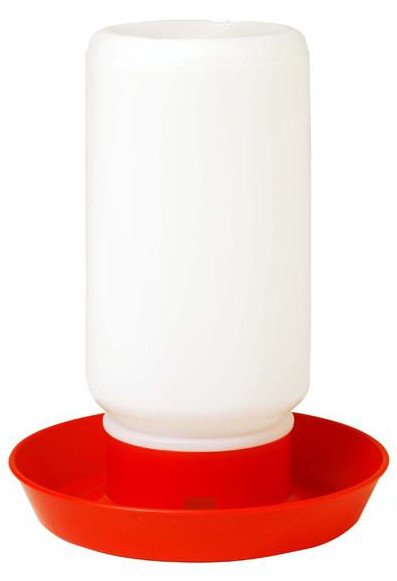 A fountain waterer is a safe option for chicks.
Health Watch: Pasty Butt
If a chick develops diarrhea, droppings can stick to and block its vent. This condition, known as "pasty butt," is common but can be fatal if left untreated as it prevents the chick from pooping.
Treatment: Gently clean the vent area with a moist towel or a cloth with a small amount of mineral oil. Monitor the chick closely to ensure it doesn't happen again.
-
Step 4: Growing Up
Play Time with Chicks (From 1 Week Old)
If the temperature is warm enough, week-old chicks can be taken out of the brooder for short, supervised periods. They are extremely curious at this age and can sometimes move quickly and get stuck in small spaces, so always watch them closely.
- Pet Safety: Always monitor interactions with household pets like cats and dogs.
- Bonding: Some chicks may imprint or bond with their “mama,” and may even follow you around. Chickens can become much like any other pet and can be trained to come when called.
Beyond the Brooder (Around 6 Weeks Old)
Once the chicks are fully feathered (typically around six weeks), they are ready to be moved to an outdoor coop with a run. The exact timing depends on your local outdoor temperature; if it is winter or particularly cold, you may need to acclimate the chicks gradually.
Important: Their outdoor housing will need to be planned carefully to protect against predators and inclement weather.